Horseradish-Bacon Twice-Baked Potatoes
The recipe Horseradish-Bacon Twice-Baked Potatoes can be made in roughly 1 hour and 40 minutes. For $1.05 per serving, this recipe covers 12% of your daily requirements of vitamins and minerals. This side dish has 394 calories, 8g of protein, and 26g of fat per serving. This recipe serves 8. It is brought to you by Foodnetwork. If you have bacon, kosher salt, horseradish, and a few other ingredients on hand, you can make it. This recipe is liked by 145 foodies and cooks. It is a good option if you're following a gluten free diet. Taking all factors into account, this recipe earns a spoonacular score of 49%, which is good. Users who liked this recipe also liked Bacon-Horseradish Potatoes, Twice-Baked Potatoes with Horseradish & Caviar, and twice-baked potatoes with fresh horseradish.
Servings: 8
Preparation duration: 30 minutes
Cooking duration: 70 minutes
Ingredients:
Crumbled cooked bacon, for topping
1 stick plus 1 tablespoon unsalted butter
1/2 cup chopped fresh chives, plus more for topping
1/4 cup chopped fresh parsley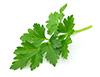
4 to 5 tablespoons horseradish, drained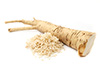
Kosher salt and freshly ground pepper
5 medium russet potatoes (10 to 12 ounces each)
1 cup sour cream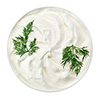
Equipment:
oven
knife
kitchen towels
baking sheet
bowl
Cooking instruction summary:
Position racks in the middle and upper third of the oven; preheat to 400 degrees F. Scrub the potatoes and dry well. Bake directly on the middle oven rack until easily pierced with a knife, 45 to 50 minutes. Remove from the oven; let cool 5 minutes. One at a time, hold each potato with a kitchen towel and halve lengthwise. Scoop the flesh into a large bowl, leaving a 1/4-inch-thick shell. Discard 2 of the potato skins. Mash the flesh with 6 tablespoons butter and 3/4 cup sour cream until smooth. Stir in the chives, parsley and 2 to 3 tablespoons horseradish; season with salt and pepper. Melt the remaining 3 tablespoons butter; brush the potato skins with 1 tablespoon melted butter and season the insides with salt and pepper. Set on a baking sheet. Mound the filling into the potato skins. Return to the oven on the top rack and bake until the filling starts browning and the skins are crisp, 18 to 20 minutes. Remove from the oven and drizzle with the remaining 2 tablespoons melted butter. Combine the remaining 1/4 cup sour cream and 2 tablespoons horseradish in a small bowl. Top the potatoes with the horseradish cream, bacon and more chives. Photograph by Ryan Liebe
Step by step:
1. Position racks in the middle and upper third of the oven; preheat to 400 degrees F. Scrub the potatoes and dry well.
2. Bake directly on the middle oven rack until easily pierced with a knife, 45 to 50 minutes.
3. Remove from the oven; let cool 5 minutes.
4. One at a time, hold each potato with a kitchen towel and halve lengthwise. Scoop the flesh into a large bowl, leaving a 1/4-inch-thick shell. Discard 2 of the potato skins. Mash the flesh with 6 tablespoons butter and 3/4 cup sour cream until smooth. Stir in the chives, parsley and 2 to 3 tablespoons horseradish; season with salt and pepper. Melt the remaining 3 tablespoons butter; brush the potato skins with 1 tablespoon melted butter and season the insides with salt and pepper. Set on a baking sheet.
5. Mound the filling into the potato skins. Return to the oven on the top rack and bake until the filling starts browning and the skins are crisp, 18 to 20 minutes.
6. Remove from the oven and drizzle with the remaining 2 tablespoons melted butter.
7. Combine the remaining 1/4 cup sour cream and 2 tablespoons horseradish in a small bowl. Top the potatoes with the horseradish cream, bacon and more chives.
8. Photograph by Ryan Liebe
Nutrition Information:
covered percent of daily need