Maple Sugar Tartlets
Maple Sugar Tartlets requires around 214 hours from start to finish. This lacto ovo vegetarian recipe serves 8 and costs $1.34 per serving. One portion of this dish contains about 5g of protein, 17g of fat, and a total of 349 calories. 306 people have tried and liked this recipe. It works well as a rather inexpensive hor d'oeuvre. It is brought to you by Epicurious. If you have salt, maple syrup, flour, and a few other ingredients on hand, you can make it. Overall, this recipe earns a rather bad spoonacular score of 35%. If you like this recipe, take a look at these similar recipes: Maple- Apple Tartlets, Maple Apple Tartlets, and PHILADELPHIA® Maple-Nut Tartlets.
Servings: 8
Preparation duration: 45 minutes
Cooking duration: 12795 minutes
Ingredients:
1 1/2 tablespoons cider vinegar
2 large eggs
1 1/4 cups all-purpose flour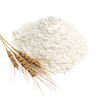
6 tablespoons packed light brown sugar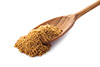
3 tablespoons granulated maple sugar (see cooks' note, below)
1/2 cup dark amber or Grade B maple syrup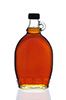
2/3 cup pecans (2 1/2 ounces), finely chopped
Rounded 1/8 teaspoon salt
1/4 teaspoon salt
1 teaspoon sugar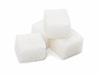
3/4 stick (6 tablespoons) unsalted butter, melted and cooled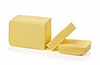
1/4 cup cold water
Accompaniment: unsweetened whipped cream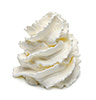
Equipment:
blender
bowl
plastic wrap
baking sheet
ladle
whisk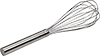
oven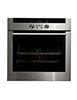
rolling pin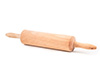
frying pan
aluminum foil
Cooking instruction summary:
Preparation Make dough: Blend together flour, sugar, butter, and salt in a bowl with your fingertips or a pastry blender until mixture resembles coarse meal with some small (roughly pea-size) butter lumps. Drizzle water evenly over mixture and gently stir with a fork until incorporated and dough forms a ball. Turn dough out onto a lightly floured surface and divide into 4 portions. With heel of your hand, smear each portion once in a forward motion to help distribute fat. Gather all dough together with scraper or your hands and press into a ball, then flatten into a 5-inch disk. Wrap disk in plastic wrap and chill until firm, at least 1 hour. Make tartlet shells: Put oven rack in middle position and preheat oven to 375°F. Roll out dough on a lightly floured surface with a lightly floured rolling pin into a 16- by 14-inch oval (1/8 inch thick). Cut out 8 (4 1/2-inch) rounds with cutter and fit each round into a tartlet pan, pressing lightly to fit into pans. Transfer tartlet pans to a baking sheet and chill until dough is firm, about 15 minutes. Line each tartlet shell with foil and fill with pie weights. Bake until edges are pale golden, 8 to 10 minutes. Carefully remove foil and weights and continue baking until bottoms are golden, about 5 minutes more. Cool completely in pans on a rack, about 10 minutes. Reduce oven temperature to 350°F. Make filling and bake tartlets: While shells cool, whisk together all filling ingredients except nuts until combined well. Return cooled tartlet shells (in their pans) to baking sheet and divide nuts among shells. Ladle filling into shells, dividing it evenly. Bake tartlets until filling is just set, 15 to 18 minutes. Cool in pans on rack, about 15 minutes, then carefully remove tartlets from pans. Serve warm or at room temperature.
Step by step:
Make dough
1. Blend together flour, sugar, butter, and salt in a bowl with your fingertips or a pastry blender until mixture resembles coarse meal with some small (roughly pea-size) butter lumps.
2. Drizzle water evenly over mixture and gently stir with a fork until incorporated and dough forms a ball.
3. Turn dough out onto a lightly floured surface and divide into 4 portions. With heel of your hand, smear each portion once in a forward motion to help distribute fat. Gather all dough together with scraper or your hands and press into a ball, then flatten into a 5-inch disk. Wrap disk in plastic wrap and chill until firm, at least 1 hour.
Make filling and bake tartlets
1. While shells cool, whisk together all filling ingredients except nuts until combined well. Return cooled tartlet shells (in their pans) to baking sheet and divide nuts among shells. Ladle filling into shells, dividing it evenly.
2. Bake tartlets until filling is just set, 15 to 18 minutes. Cool in pans on rack, about 15 minutes, then carefully remove tartlets from pans.
3. Serve warm or at room temperature.
Make tartlet shells
1. Put oven rack in middle position and preheat oven to 375°F.
2. Roll out dough on a lightly floured surface with a lightly floured rolling pin into a 16- by 14-inch oval (1/8 inch thick).
3. Cut out 8 (4 1/2-inch) rounds with cutter and fit each round into a tartlet pan, pressing lightly to fit into pans.
4. Transfer tartlet pans to a baking sheet and chill until dough is firm, about 15 minutes.
5. Line each tartlet shell with foil and fill with pie weights.
6. Bake until edges are pale golden, 8 to 10 minutes. Carefully remove foil and weights and continue baking until bottoms are golden, about 5 minutes more. Cool completely in pans on a rack, about 10 minutes. Reduce oven temperature to 350°F.
Nutrition Information:
covered percent of daily need