3-Ingredient Oreo Fudge (with mint option)
3-Ingredient Oreo Fudge (with mint option) takes roughly 45 minutes from beginning to end. This recipe makes 32 servings with 180 calories, 2g of protein, and 9g of fat each. For 46 cents per serving, this recipe covers 3% of your daily requirements of vitamins and minerals. 14 people were impressed by this recipe. This recipe from Fountain Venue Kitchen requires chocolate, oreos, oreos, and sweetened condensed milk. Overall, this recipe earns a rather bad spoonacular score of 14%. If you like this recipe, you might also like recipes such as Three Ingredient Peppermint Oreo Fudge, Mint Oreo Marshmallow Fudge, and Chocolate Mint Oreo Fudge.
Servings: 32
Ingredients:
18 ounces white baking or melting chocolate
Optional: 1/2 teaspoon peppermint extract if using mint Oreos; 2 extra Oreos and 1-2 tablespoons extra chocolate (white or dark) for decorative topping
2 1/2 cups (about 12) Oreos (regular, golden, or mint–choose your favorite)
1 (14-ounce) can sweetened condensed milk (not evaporated milk)
Equipment:
baking paper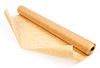
cutting board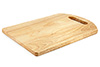
double boiler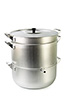
knife
bowl
frying pan
pot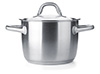
chefs knife
Cooking instruction summary:
Line an 8-inch square pan with wax or parchment paper, letting the sides overhang slightly for easy removal later. Set aside.On a cutting board, cut the Oreos into 5 or 6 pieces each. I like to use a serrated or other sharp knife and saw gently to keep the crumbs to a minimum. Set aside.In a microwave-safe bowl, melt the white chocolate in 30 second increments, stirring in between, until almost completely melted. Stir to melt the last little pieces in the residual heat. (Optionally, you may melt the chocolate in a double boiler, or fashion a makeshift version by placing a smaller pot or heat-proof bowl within a larger pot.)When the chocolate is melted and smooth, stir in the sweetened condensed milk. If you are making the mint version, add the peppermint extract at this time, too. Immediately add the Oreo pieces, and gently stir to incorporate.Pour the mixture into the lined pan, spreading evenly. As an option, chop 2 extra Oreos and melt 1-2 tablespoons of additional chocolate. Distribute the cookie pieces evenly over the surface, and then drizzle with the melted chocolate. (To make a thin drizzle, scoop the melted chocolate into a small zip-top bag. Snip off a tiny corner and use like a piping bag.)Let the fudge set. I like to cool the fudge at room temperature for a few minutes, and then refrigerate for several hours. Once set, the fudge can be easily removed from the pan for cutting by lifting the edges of the wax or parchment paper. The paper will easily pull away from the set fudge.Cut into squares and place in an airtight container to store. (With their long blades, a bread or chefs knife make it easy to cut uniform pieces.) The fudge will keep for several weeks in the refrigerator but will keep for at least a week on the counter. Some people prefer to eat the fudge cold, others enjoy it at room temperature.
Step by step:
1. Line an 8-inch square pan with wax or parchment paper, letting the sides overhang slightly for easy removal later. Set aside.On a cutting board, cut the Oreos into 5 or 6 pieces each. I like to use a serrated or other sharp knife and saw gently to keep the crumbs to a minimum. Set aside.In a microwave-safe bowl, melt the white chocolate in 30 second increments, stirring in between, until almost completely melted. Stir to melt the last little pieces in the residual heat. (Optionally, you may melt the chocolate in a double boiler, or fashion a makeshift version by placing a smaller pot or heat-proof bowl within a larger pot.)When the chocolate is melted and smooth, stir in the sweetened condensed milk. If you are making the mint version, add the peppermint extract at this time, too. Immediately add the Oreo pieces, and gently stir to incorporate.
2. Pour the mixture into the lined pan, spreading evenly. As an option, chop 2 extra Oreos and melt 1-2 tablespoons of additional chocolate. Distribute the cookie pieces evenly over the surface, and then drizzle with the melted chocolate. (To make a thin drizzle, scoop the melted chocolate into a small zip-top bag. Snip off a tiny corner and use like a piping bag.)
3. Let the fudge set. I like to cool the fudge at room temperature for a few minutes, and then refrigerate for several hours. Once set, the fudge can be easily removed from the pan for cutting by lifting the edges of the wax or parchment paper. The paper will easily pull away from the set fudge.
4. Cut into squares and place in an airtight container to store. (With their long blades, a bread or chefs knife make it easy to cut uniform pieces.) The fudge will keep for several weeks in the refrigerator but will keep for at least a week on the counter. Some people prefer to eat the fudge cold, others enjoy it at room temperature.
Nutrition Information:
covered percent of daily need